Industrial Safety Solutions

Save $15 on SafetyPro Vinyl GHS and ANSI Labels! Limited Time Offer, Order Today!

Category: SafetyPro Troubleshooting

Return to Frequently Asked Questions Category List


BLINKING RED LIGHT ERROR: After I print a label, extra material is fed out of the printer and a blinking red-light comes on. I can not print another label until I turn the power off and back on again, and the cutter does not activate.

This error looks complicated, but is very simple. It is caused by a driver setting known as the Gap Sensor. The Gap sensor is for labels with a gap between each label, such as Arc Flash or GHS die-cuts. If the Gap Sensor is on but continuous material is loaded, the printer will feed material searching for the gap, and not finding one, it will turn on the error light. To fix the error, first power off your machine for 5 seconds and power it back on. Locate your Windows printer in your settings, and select Printing Preferences. On the Stock tab, locate the media type. Set it to Continuous if you're using continuous roll vinyl (where the labels are not pre-cut with a gap between each one), or Labels With Gaps (only if you actually have a gap between each pre-sized label).


My cutter is not operating after I print a label, but I don't have a red blinking light.

You may need to turn your cutter on in the driver. Go to Settings and locate your printer, then open the Printing Preferences. Go to the Stock tab, and change your Post-Print Action to Cut, and Occurrence to After Every Page. Your printer will now cut after every label.

If your cutter is not activating even though it is enabled in the driver, you may have a corrupted print driver. Follow the instructions to re-install your driver.


My printer feeds labels when I try to print, but nothing is printed on them. Is something wrong with the hardware?

This problem is usually not hardware related. There are a few issues that may cause this problem:

1. Driver not set properly - Go to your Windows printer settings, and open the Printing Preferences for your label printer. Under the Stock tab, make sure your media setting is set to Thermal Transfer, and NOT to Direct Thermal or Use Current Printer Setting.

2. Ribbon ink not loaded properly, or not loaded at all - improper supply loading can cause the machine to appear to print, but produce blank labels. Watch the loading video under the support section of this website to make sure your ribbon is loaded properly.

3. A corrupt printer driver can cause blank prints. If your system was working previously, and stopped working suddenly, then you may use the DriverWizard in the drivers folder, to Remove All Drivers by Seagull. Then restart your computer, re-download, and re-install.


My Evo3 or Evo6 is giving a "Paper Jam" error when I try to print, but everything is loaded fine. What is wrong?

The paper jam error on the Evo3 or Evo6 printers usually results from incorrect driver settings which make the printer expect a certain type of label material (labels with gaps). If you're getting a paper jam error when you try to print a label, but the printer is loaded properly, make sure that your driver settings match your loaded supplies, as per the manual. If you are set to Gap labels but are using continuous materials, you will encounter this error.
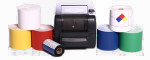

My PDF file is not rotated properly, and the orientation settings don't seem to help.

If your PDF file is not oriented properly, you may need to use the software or driver to rotate the print. This does not work properly in some PDF viewers. We recommend using properly formatted PDF files, where the page size and orientation are set correctly. If that isn't an option, try using Microsoft Edge to view and print your PDF file. Open the PDF in Edge, then use CTRL+SHIFT+P to print using the system dialog. Select your printer, then enter the preferences to change the orientation.


I moved my spreadsheet-linked files and now my linking doesn't work.

In FacilityWare, absolute file names and locations are stored in the template file. If you move your template or your spreadsheet, you will break the spreadsheet linking. Unfortunately, there is no way to correct this error, except by re-linking each of your fields. To avoid this hassle, keep your files in a location where they will not need to be moved. SafetyPro Label Designer makes the process of re-linking a spreadsheet easier, and is another alternative if you feel you will be moving your files frequently.


My SafetyPro 9G says "paper jam" on the screen.

The "paper jam" error can mean that the paper is having trouble moving, but it can also occur when using die-cut labels for the first time. If you are using die-cut (labels with gaps), please run the calibration from the on-screen menus on the printer.


A small sliver of label is being cut off the next die-cut label every time I print.

If you're printing die-cut, pre-sized labels (such as arc flash or GHS), and a small sliver of the next label is being cut off (rather than the cut being centered in the gap), try setting your Feed Offset to -0.05. You can find the Feed Offset setting in the Printing Preferences, under the Stock tab.


I'm trying to print die-cut labels, but my labels are getting cut in half.

If your labels are getting cut in the wrong spot, you probably have your driver set to Continuous stock. Go to your Printing Preferences, and set the Type to Labels With Gaps in the Stock tab. Print two labels to read the gap properly before continuing; the second label should cut in the gap.


I have an orange bar on my screen, but it prints as a black bar.

Some customers print PDF files that were given to them by engineers, who usually generated them from software like SKM. Some of these PDF files have orange or red header backgrounds, which are visible on the screen. Since the SafetyPro is a monochromatic printer, color will not print. If you're getting a black or gray hatched bar over your header, it may be due to the color being included in the label. Ideally, you should have your engineer re-generate the PDF in black-and-white, but if that is not possible, you may be able to print what you have by going to your Printing Preferences, Graphics Tab, and setting your dithering to None. Additional changes may need to be made to the Graphics settings as well.


My print is very large, or very small, and doesn't match my screen.

If your print doesn't match what you see on your screen, you may have an incorrect driver installed. Your printer driver must match the DPI settings of your printer hardware, and a mismatch will mean a mismatch in the print size. To correct this problem, follow the instructions to re-install your printer driver.


My SafetyPro label printer is showing up as an unknown or unrecognized device.

There are several reasons why your SafetyPro might show up as an unknown or unspecified USB device. To troubleshoot this problem, try the following:

1. Make sure your printer is connected directly to the computer, and not into a docking station or hub. If you're using a desktop PC, ensure you are plugged into a USB port on the back of the computer.

2. Turn the power off on the printer for 5 seconds, before turning it back on.

3. If necessary, right-click any unspecified or unknown device listed in your Devices, and remove it from your system, then power cycle the printer again for 5 seconds before trying again.

4. Make sure you are using the correct power supply with your printer.


My ribbon ink is coming out the front of the printer, and getting cut with my label.

There are two issues that will cause this:

1. Your ribbon is loaded incorrectly - if your rewind ribbon spindle is in the printer with the lip on the wrong side, it will not engage the gears to rewind the ribbon, and the ribbon will be pulled out the front of the printer. Please carefully watch the ribbon loading video, and review the ribbon loading flyer, then re-load your ribbon.

2. Your printer driver Method may be set to Direct Thermal or Use Current Printer Settings. Go to your list of printers and open the Printing Preferences for the label printer. Go to the Stock tab, and make sure Method is set to Thermal Transfer.